Author name: Khansa Maryam

is peanut butter safe for cats
Health

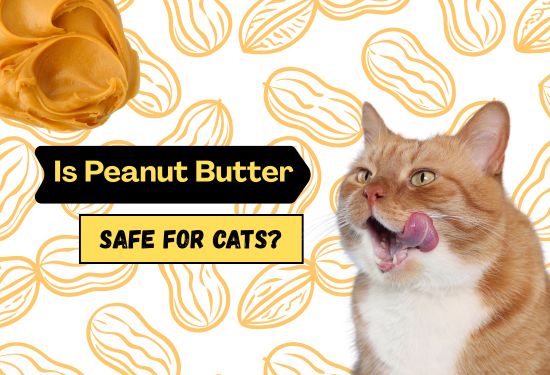
Is Peanut Butter Safe for Cats: 7 Truths About Peanut Butter & Cats

As we all know, cats happen to be nosey, and there is nothing that could interest them more than something new on your spoon. If your feline has ever tried to dip a paw into your peanut butter jar, you’re not alone. This is the million-dollar question facing many cat owners in the U.S.: Is peanut butter safe for cats? The answer isn’t black and white, and that’s exactly why you’re here. Peanut butter is a pantry staple in many American households, but does that mean it’s okay to share with our whiskered companions? Get ready because today we are getting deep into the seven eye-opening truths about cats and peanut butter. We will dispel all the myths and make it clear and cat-friendly for you. Truth #1: A Tiny Taste Won’t Harm Most Cats—But It’s Not Ideal We may begin with fundamentals. Can I give my cat peanut butter? Technically, it was, yes, though with huge caveats. Most healthy adult cats are not likely to sustain any injury, even by a little lick now and then. But here’s the catch: peanut butter offers zero nutritional benefit to felines. Cats are strict carnivores, and their bodies are designed to obtain the same nutrients based on meat, not legumes and sugar. Although peanut butter does not appear dangerous, it contains a lot of fat and sugar, and can cause digestive upsets, even in case of small portions. Truth #2: Xylitol Is a Deadly Danger for Cats Is peanut butter toxic to cats?  Plain peanut butter isn’t always bad, but not all peanut butters are made equal. Many American varieties contain xylitol, a sugar substitute that is extremely toxic to dogs (and, of course, cats). Is peanut butter poisonous to cats, then? Not in its natural content, but xylitol-laced peanut butter can just do it. Just ingesting a very small quantity can result in a life-threatening decline in blood sugar level and liver failure. Pet Parent Tip: The ingredient label on any food must be read first before giving a taste to a cat. Avoid using any artificial sweetener products. Truth #3: Peanut Butter Poses a Risk of Choking. The sticky, thick viscosity of peanut butter isn’t only untidy; it can also cause cats to choke. Cats are not inclined to gulp their food as dogs do, but chew and lick. Peanut-butter-like substances can stick to their throat and can cause coughing and irritation.  So, if you’re thinking, is peanut butter safe for cats in terms of texture? The answer: no, worse when chopped up or broken up into lumps. Truth #4: Peanut Butter Might Trigger Allergies or Intolerances As with people, are cats allergic to peanut butter or any other ingredients that they may not know? Yes, they can. Once you or your cat feels an itch, throws up, has diarrhoea, or changes its behaviour after licking peanut butter, perhaps it is under an allergic attack. There is also an increase in nut allergies in pets, even though it is not widespread, it is prevalent in households in populated areas in the United States, where servers often sell processed pet treats. Warning Sign to Lookout: too much scratching, red skin, or wheezing after consuming peanut butter? That is your signal to ring the vet. Truth #5: Cats and Peanut Butter—A Relationship Based on Curiosity, Not Nutrition Let’s get one thing straight: peanut butter for cats is not a health food. As opposed to dogs, who would obviously enjoy a lick of peanut butter during or after training, especially when taking a pill, there are no actual benefits to cats regarding the same. Actually, feeding your cat peanut butter may lead to weight gain, stomach disorders, or even pancreatitis due to a lot of fat in the body. The question that arises, though, is peanut butter safe for cats? It is a big no nutritionally. Rather, choose cat food specially made treats designed to be digestible in their digestive system and diet. You will be doing a much better favor to your cat. Truth #6: The Real Risk Is in Overuse and Misunderstanding The blog post’s main point is to address a common misconception raised in every pet owner: something isn’t always beneficial just because it isn’t poisonous. So, is peanut butter safe for cats if given once a month? Possibly. Is it safe daily? Definitely not. Repeated exposure can increase risks of: And remember, just because your cat seems to like it, doesn’t mean it likes them back! Truth #7: Alternatives Exist—So Why Risk It? The great news is? In case you want to conceal pills or treat your cat, then cat-safe options can be found in the U.S. market. Think: Not only do these options taste better to your cat, but they are also much more compatible with the feline digestive system and nutrition. The next time your kitty is staring at you with that (pretty please) look, then the peanut butter we had better not use, and why not have something a bit safer at hand. Final Verdict: Is Peanut Butter Safe for Cats? Let’s finally address the question:  In a minute, infinitesimal quantities No xylitol, additives It is not advisable to take as a daily treat If you’ve ever caught yourself wondering, “Is peanut butter safe for cats?” or “Can I give my cat peanut butter without worry?”—this guide should give you the clarity you need. Peanut butter may be comfort food to some Americans when they are young, but your cat is not going to like this snack. The risk to health is so very detrimental to short-lived taste bud pleasure. FAQs About Cats and Peanut Butter Q1: Can I give my cat peanut butter to hide a pill?A: Only if it’s xylitol-free and in a small amount. Better still- give a go to the pill pockets (specially designed cat-friendly varieties). Q2: Does peanut butter kill cats?A: From the standpoint of xylitol in peanut butter or too much salt in the food, indirectly, it might lead

homemade laundry detergent recipe
Lifestyle

2 Best Homemade Laundry Detergent Recipe Variants

Tired of spending the hard-earned money on the commercially available detergents full of questionable ingredients? You are not alone. The effortless homemade laundry detergent recipe is in a marvelous second childhood with the lifestyle of being environment-conscious and economical becoming quite common. The solution to how to make homemade laundry detergent is going round the world. It’s not just about saving money anymore. People also want control over what goes into their clothes and onto their skin. So get your hands dirty and let’s get started if you’re prepared to give up store-bought items. Why Use Laundry Detergent Made at Home? Funny to think that making your own detergent is a few bucks, that it all boils down to this, it is just about living intentionally. Here’s why more people are jumping on the DIY train: The price of detergent in the supermarket can be quite steep, especially to big families. Following just a couple of cheap ingredients you can make your own laundry detergent that will last you months and will only cost you a few pennies a load. Do-it-yourself detergent gives you choice over every ingredient so you can avoid any useless chemicals, dyes or artificial fragrances. You can either leave it completely fragrance-free or use the essential oils that are natural to give it a slight odor. It also implies fewer packaging waste, which makes it a wise option of sustainable life. In case you or your family members are allergic or sensitive to skin issues then the change to fragrance-free laundry detergent which is homemade can make a huge difference. No longer rashes, inflammations, and itches on clothes! What You’ll Need: Ingredients & Tools Basic Ingredients: These are the main ingredients of any good homemade laundry detergent recipe and you can make them slightly different according to your personal taste or allergies. Tools: DIY Powder Laundry Detergent Recipe (Easy & Effective) Ingredients: Instructions: How to Use: It is a super handy and high shelf-stability, diy homemade laundry detergent recipe that is good to use on a daily basis. If you’re searching for an effective powder laundry detergent recipe, this one’s got your back! Easy Homemade Liquid Laundry Detergent Recipe Prefer a liquid version? Here’s how to make a gentle and effective alternative. Ingredients: Instructions: It is a low-impact liquid laundry detergent suitable to use with fabric and simple to prepare in large quantities. It is truly the best homemade laundry detergent recipe many say, due to its smooth texture and versatility. Powder vs Liquid – Which One’s Better? Feature Powder Detergent Liquid Detergent Shelf Life Longer (no water = no mold) Shorter (must be stored properly) Cleaning Power Great for general stains Better for greasy or oily stains Prep Time Quick and easy Takes more time and heating Eco Impact Less packaging, more concentrated Slightly higher water usage Briefly put, powder is quicker and long-lasting whereas liquid offers a slight looseness. Select according to your liking and machine washing. Customizing Your Detergent Want to make it truly yours? Here’s how: Whether you’re all about that lavender aroma or keeping it scentless, the recipe is fully adaptable. Storage & Usage Tips Once your homemade laundry detergent is created, there is only adequate storage and use in order to make it effective and prolong its usage as much as possible. This is how to make the best out of your DIY: Best Storage Containers Store in a glass deterring or a plastic container, or a detergent tube. This makes moisture not to cause clumping. Put into gallon jugs or empty laundry soap bottles or use a beverage distributor with spout. FAQs 1. How to make homemade laundry detergent without borax? Just omit the borax and twice the washing soda or the baking soda. The outcomes remains to be potent and secure. 2. Is homemade laundry detergent safe for HE machines? Yes! All you need is a low-sudsed homemade laundry detergent recipe such as the above and cut the amount you use in each load. 3. Can I prepare laundry detergent in large quantities? Absolutely. By simply increasing the amount of ingredients. Put them into several jars or containers so that they can stay fresh. Conclusion Doing laundry may not be the best idea to save money, but it is the following way to healthier and cleaner living. No matter which way you like it, the powder type or a liquid combination, when you follow this homemade laundry detergent recipe, it is all under your control. It is something everyone can do since it requires basic ingredients and does not need elaborate equipment. You are ready to get rid of store-bought? Try this homemade laundry detergent recipe today!

homemade laundry detergent
Lifestyle

7 Reasons Why Homemade Laundry Detergent Is Better

As far as clean clothes are concerned, a person should use the right laundry detergent more than one would imagine. Although all brands which are sold in stores can claim to be powerful cleaners, they are usually full of strong chemicals that can damage your skin and the environment. And this is where a homemade laundry detergent comes in (it is gentler, safer, and less expensive). So, why not jump into the reasons why it is better to go with making your own detergent? 1. Sensitive Skin-Friendly Do you know what’s the biggest advantage of homemade laundry detergents? It is inherently free of chemicals that cause skin irritation and scent. Synthetic colours, preservatives, and fragrances used in the majority of over-the-counter detergents have the potential to cause allergic reactions. In children or those with sensitive skin, it might be more severe, much like eczema. Using the personalized recipe, you may mix each ingredient yourself, which is safe and hygienic. 2. Cleaner Clothes Without Chemical Residue Amazingly, most of the commercial alternatives would deposit the residue that develops into a layer on your clothes. Such buildup can reduce the lifespan of textiles and retain odours. It has been discovered that a DIY laundry detergent recipe using natural chemicals like baking soda and washing soda helps to completely rinse and break down the detergent. The outcome? Cleaner, Fresher clothes. 3. Fewer Toxins in Your Home Did you know that harsh and even dangerous ingredients are present in the majority of commercial laundry detergents?  Many of these harmful ingredients can be eliminated and a cleaner, safer environment can be created by utilizing homemade laundry detergent. Here’s what you’re avoiding: On the flip side, homemade laundry detergent gives you: Concisely, when you hear yourself asking this question, What is the most toxic laundry detergent? then, in many cases, this is found right under your nose. One of the easiest solutions towards a toxin-free home is to abandon them in favour of a DIY attempt. 4. Environmentally Friendly The majority of the homemade solutions are biodegradable and contain no phosphates and sulfates, which are two of the biggest culprits in water pollution. This is the difference it really makes: Cooking dishes are normally made using natural ingredients, which are eco-friendly and are not harmful to the environment. You avoid phosphates, sulfates and chlorine that may contaminate water courses and kill aquatic life. Wash your own containers as opposed to throwing away plastic jugs once or twice a week. You can safeguard your family by switching to a DIY laundry detergent recipe. And the plus point is that you will also be saving the Earth. That is a win-win. 5. Save More Than You Think If you’re trying to cut back on everyday household expenses, starting with your laundry routine can make a big difference. You know the fact that homemade laundry detergent is cleaner and budget-friendly as well. A version can be developed at only pennies compared to commercial versions that may sell as high as 0.20 per load. It is a small change that could lead to an eventual big saving, particularly for a family with more than one child or an individual who does a lot of laundry. 6. Cost-effective and Customizable Talking of money! Commercial detergents (the so-called eco-friendly or fragrance-free laundry detergent) can be pricey. Yet the best homemade laundry detergent recipe has a cost of less than a cent per load. It takes no time, you can simply prepare a huge amount that can last you many months, and it would save you hundreds per year, yet the performance is not decreased. 7. Easy to Make at Home Do you think it is a hassle to do your own laundry detergent? Think again! The best bonus is that it is so easy to make a batch at home, without any special equipment or a degree in chemistry. Here’s why it’s easier than you think: FAQs Q1: What ingredients are used in the best homemade laundry detergent recipe?Baking soda, washing soda, grated bar soap (like Castile), and extra essential oils as aromatic additions could be found in an excellent DIY recipe. Q2: Is homemade laundry detergent safe for HE (high-efficiency) machines?Yes! There is a lot of low-sudsing homemade detergent which is ideal to run in HE machines provided that the quantity is correct. Q3: Can I make a fragrance-free laundry detergent at home?Absolutely. All you have to do is avoid the essential oils and use an unscented soap base to make it 100% fragrance-free. Q4: How much money can I save with DIY laundry detergent?Commercial brands have price tags of $0.20 or more, whereas you can make homemade choices as cheap as $0.05 per load saving you up to 150 bucks a year on a family of four. Q5: What is the most toxic laundry detergent to avoid?The most dangerous brands are those that use chemicals like 1,4-dioxane, formaldehyde and artificial fragrances. A product’s label should always be compared before buying. Conclusion It is indeed more of a wise choice of lifestyle rather than a trend to shift to homemade laundry detergent. It can provide cleaner garments and even safer skin, with major savings, and it is greener for the environment. It is a simple successful switch that you can make today with a few simple ingredients and a little know-how to switch out of the chemically laden commercial brands without a drop of chemical in sight. Your laundry—and your skin—will thank you.

How to plan an international trip
Travel

How to Plan an International Trip: A Step-by-Step Travel Guide for First-Timers

The experience of traveling out of the country is an exciting experience, particularly  for a first time traveler. Planning an international trip may be like a one thousand-piece jigsaw puzzle. There are many things to balance, such as deciding when and where to travel, protecting your documents, and controlling your spending. The good news is? So long as you have the appropriate plan and action list, then it is completely within reach, even on your first attempt. So in this step-by-step guide, we will guide you through everything that you need to know about how to plan an international trip which is now stress free, stress free and dare we say-fun! Is travelling a hobby or a lifestyle? It is possible to say that traveling can be a hobby or a lifestyle at the same time, it all depends on the approach. To many traveling is a hobby- a past time activity, a hobby to relax, to visit new cultures, be unstuck. These travelers organize weekend getaways as a way of enjoying every moment as a change of scene. In the other side, to other people, traveling is their way of life. Travel bloggers, digital nomads, and those who love adventure tend to base their lives on the fact that they move constantly. People that travel simply do not exist without it. Step 1: Pick the Right Destination and Travel Time The most thrilling and the first is the selection of destinations you should go to. Such a choice will determine the rest of your travel arrangements. Prior to booking anything, think about your budget, travel season, and safety conditions, as well as a possibility to attend the area without a visa. Such countries as Italy, Japan, or Thailand will be great destinations to visit by first-time travelers. They are tourist friendly, cultured and user friendly. Did you ask yourself how to plan for an international trip? Here is the basis! Step 2: Prepare Your Passport and Visa Keep your travel documents in order before ticketing your flights. Most countries demand that you have a passport with at least 6 months left before it expires upon landing in the country. Getting a visa (if required) should also be your priority. What you should do: Step 3: Book Flights and Accommodation Smartly Once your documents are in order, it’s time to book your hotel and airfare. Take your time because prices might vary greatly depending on your schedule and degree of flexibility. When booking flights: For accommodation: Planning an international trip gets a lot easier when you book early and compare all your options. This is especially important if you’re figuring out how to plan international trip wisely — early decisions save money and reduce stress. Step 4: Build a Simple and Flexible Itinerary While spontaneous travel is fun, having a basic plan helps avoid confusion and wasted time. You don’t need a strict schedule — just a flexible outline. Your itinerary can include: Make space for: Step 5: Pack Smart for International Travel One of the most underrated skills for international travel is knowing things to take for international travel without overpacking. Begin with the basics: documentation, passport, and change of clothes at hand in the carry-on in the contingency of the delay in the luggage. Dressing must depend on the kind of weather. Don’t forget an umbrella or a lightweight jacket to keep in your travel backpack. It is essential to have comfortable walking shoes, particularly if you intend to do some touring. Step 6: Stay Connected and Safe While Abroad After landing, the use of internet will make your travel easier. It assists in navigation, communication, and following up events of the area. You may purchase an international roaming package with your mobile phone company before you are there, or purchase a local SIM card once you have arrived. To stay connected: Safety alerts: FAQs 1. What should I do first when planning an international trip? Begin by having a local place that you will feel comfortable, where you will have interest and one which you can afford. Don’t forget to check the legitimacies of your passport and visa acquisition requirements. 2. How far in advance should I book my international flight? In order to have the lowest prices, you should also book your flight two to three months in advance. Make reservations even early if you’re going during a busy time of year. 3. Do I really need travel insurance for my first international trip? Indeed, it is highly recommended to take up traveling insurance. It gives you assurance that you won’t end up spending your holiday covered in stress as it takes care of unexpected events such as medical emerencies, airline delays or baggage loss. Conclusion There you go, now you have the complete tips on how to plan an international trip on every angle. The planning process may appear to be intimidating but this is also a massive aspect of the excitement. Being well-prepared will enable you to act more intelligently, safely, and without fear when traveling. Now go ahead and book that dream trip today!

Scroll to Top